Thursday, October 25, 2012

Short Rib and Chorizo Chili

The Annual Office Chili Cook-Off


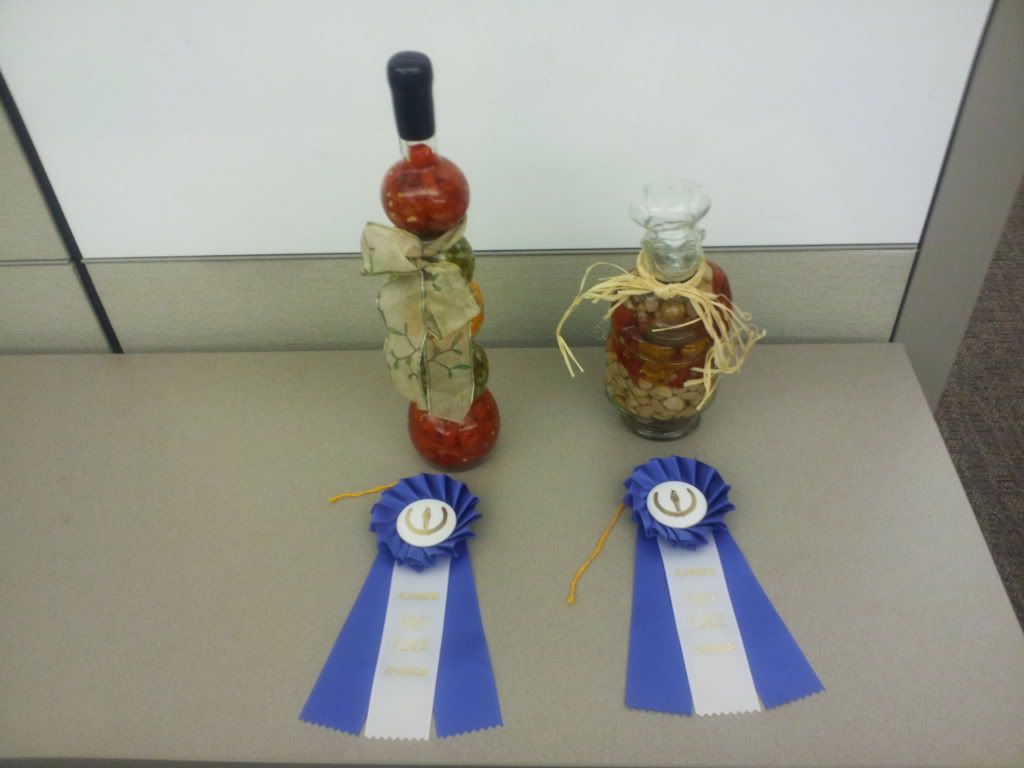
Today was the annual chili and cornbread cook-off at work.  I won first place in both, which was a bit of a surprise because I was using a new chili recipe this year.  I've won second place in chili twice in the past, so decided I needed to make some changes if I ever wanted to get a blue ribbon.  I not only made changes, I made a completely different recipe based on ideas I picked up from various Internet sites.  Here's a photo of my trophies/ribbons, followed by my chili recipe (I'll post the cornbread recipe sometime in the near future):


Terry's Award-Winning Beef Short Rib Chili

Ingredients
Black Peppercorns
2 Tablespoons Cumin Seeds
1 ½ Teaspoons Coriander Seeds
1 Star Anise
1 Tablespoon Coffee Beans
Kosher Salt
8 Pounds Beef Short Ribs, Bone-in
2 Tablespoons Peanut Oil
3 Pasilla Chile Peppers (Dried Chilacas)
2 Chile de Arbol peppers, Dried
2 Chipotle Chile Peppers (Smoke-dried Jalapenos)
1 Quart Chicken Stock
2 Anchovy Filets
2 Teaspoons Soy Sauce
2 Tablespoons Tomato Paste
1 Ounce Unsweeted Chocolate
1 Yellow Onion
2 Shallots
4 Cloves Garlic
2 Fresh Jalapenos
1 Tablespoon Dried Basil Leaves
1 Tablespoon Dried Oregano Leaves
4 Bay Leaves
1 Pound Mexican Chorizo Sausage
1 28-ounce Can Crushed Tomatoes
¼ Cup Apple Cider Vinegar
3 15-ounce Cans Black Beans (plain, without sauce)
1 Envelope Sazon Goya Seasoning
¼ Cup Vodka
4 Tablespoons Hot Sauce (Preferably Frank's RedHot)
Ground Cayenne Pepper

Grind the black peppercorns using a coffee grinder and set aside.

Combine the cumin, coriander, and star anise in a small frying pan or saute pan. Gently toast the spices over medium heat until aromas are intensified and color is slightly darkened. Do not allow the spices to smoke, or the coriander seeds to pop. Once toasted, grind the spices together in the coffee grinder and set aside.

Grind the coffee beans in the coffee grinder and set aside.

Remove the tops from the dried chiles (pasilla, arbol, chipotle), remove the seeds, and cut them into rough 1” pieces. Toast the chiles in a large, heavy pot or dutch oven over medium-high heat, stirring frequently, until darkened but not burned. This will release the intense aromas of the peppers. Once toasted, place them in a small bowl and set aside.

If the short ribs are Korean-cut (i.e. flanken style), separate them between the bones using a sharp, heavy chef's knife. Trim excess fat and remove any membranes/silverskin. Sprinkle the kosher salt and freshly-ground pepper on all sides of the ribs. Heat up pot/dutch oven over a very high flame, then add two tablespoons of peanut oil to the pan. When the oil is rippling, shimmering, and smoking, add the ribs and brown them well on all sides. They probably won't all fit at the same time, so work in batches. As the ribs are removed from the pan, place them in a roasting tray or on a large platter and allow them to cool. Once all of the ribs are browned, pour off the remaining oil/rendered fat into a bowl and set aside.

Turn the heat on the pot down to medium-high and deglaze with 1 cup of the chicken broth. Use a flat spoon or sturdy spatula to scrape up the browned bits stuck to the bottom of the pot. Reduce heat to low and simmer. Add the toasted, dried chiles to the broth and cook until they are softened and the chicken stock is reduced by half.

Pour the stock/pepper mixture into a blender or food processor. Add the anchovies, soy sauce, and tomato paste. Add the gound coffee. Add the ground cumin/coriander/star anise mixture. Chop the unsweetened chocolate and add it. Blend on high speed until completely pureed and smooth. Set aside.

Once ribs are cool enough to handle, trim meat from the bones and cut into smallish (¼ to ½-inch) pieces. Reserve the bones for use later. Add any accumulated juices from the roasting tray or platter to the pureed chiles.

Dice the onion and shallots. Mince the garlic. Trim the tops from the jalapeno peppers, remove seeds, and mince. Pour the reserved oil from browning the ribs into the pot. Add additional peanut oil if necessary to make 4 Tablespoons. Turn heat to medium. When oil is shimmering, add the onions and saute, stirring frequently, until they are softened and translucent. Add shallots, garlic, jalapenos, basil, and oregano. Continue to cook and stir until fragrant, about 1minute. Add pureed chile mixture and cook for a few more minutes, stirring frequently and scraping the bottom of the pot until the chile mixture begins to fry and leaves a coating on the bottom of the pot. Add the remaining chicken stock, chopped rib meat, rib bones, and bay leaves. Bring to a simmer, scraping the bottom of the pan to loosen any brown bits. Reduce heat to the lowest possible setting and cook, with the cover slightly ajar, for 1 hour.

While chili is gently simmering, fry the chorizo sausage in a skillet or frying pan over medium-high heat until crisped and slightly browned.

Add the chorizo, crushed tomatoes, cider vinegar, beans, and Sazon Goya seasoning. Continue to cook with the cover slightly ajar until beef is tender and broth is rich and slightly thickened, about 2-4 hours. Add water if necessary to keep beans and meat mostly submerged.

Using tongs or a slotted spoon, remove and discard bay leaves and rib bones. Add vodka and hot sauce, stirring to combine. Season to taste with salt, pepper, and additional vinegar. For additional heat, add a small amount of cayenne pepper, tasting frequently and adding gradually to avoid making the chili too spicy.

Serve immediately, or for best flavor, allow to cool and refrigerate overnight.


Thursday, August 16, 2012

North Carolina-Style Pulled Chicken

Have you ever been to North Carolina?  I suppose some of you have, and others may even have been born there.  As for me, I've never been anywhere close to North Carolina, but I have had North Carolina-style barbecue, and it is absolutely wonderful.  The sauce is what makes it special.  Instead of the sweet, tomato-based sauces we are used to here in the Midwest, in the Carolinas they use a vinegar-based sauce that isn't sweet but is tangy and spicy.  It pairs perfectly with chicken and pork.  Today I made chicken.

The chicken came from Grossman's Meats, a farm in Preston, Iowa that markets pasture-raised poultry at the Freight House Farmer's Market here in Davenport.  I buy eggs from them regularly, and recently, with the wildly fluctuating food prices, I've started buying chicken from them as well.  Most of the other vendors have raised their prices, but Grossmans is still charging the same $1.75/lb they were asking for  back in the spring, before the drought.  This particular bird tipped the scales at about 4.8 pounds and cost around $8.50.  I placed it in the usual brine this morning: 2 quarts of water and 1 cup of kosher salt.  The water wasn't quite enough to cover the bird, so I added another quart.  I didn't bother adding any more salt though - 1 cup is plenty for up to a gallon of water.

At noon I pulled the chicken out of the brine, rinsed it, and threw it on the cutting board:


A five-pound chicken is pretty big.  This thing had hips like my ex-wife.  I decided to spatchcock it, so that it would smoke faster and it would be easier to pull the meat off of once the cooking was over.

Spatchcock Your Bird

It sounds dirtier than it is, and is actually pretty easy to do.  Spatchcocking is simply removing the backbone and breastbone of a bird so it can be folded out flat.  It's easy to accomplish with a small, sharp knife and a pair of kitchen shears.  To start, place the chicken breast-down on the cutting board with its tail towards you:


Take your kitchen shears and cut along one side of the backbone all the way from the rear opening to the front opening.  Then, do the same thing on the other side.  Don't be afraid to get rough with it if necessary. 


Once you have the backbone out, spread the two sides open so you have easy access to the inside.  Using your small knife (I used a 6" Calphalon utility knife) go ahead and remove any excess fat deposits, giblets, and any other nasty bits that don't look appetizing.  I had to remove a portion of the trachea from my bird, as well as large amounts of subcutaneous fat.  Once you are satisfied, give the bird a rinse.  

Now it is time to remove the breastbone.  Take your small but sharp knife and score along both sides of the breastbone.  Then, slip your fingers or thumb between the breastbone and the flesh of the breast and separate the breastbone from the meat as well as you can without using excessive force.


Here's a close-up:

You can see that part of the breastbone is cartilage, and further up the sternum it is solid bone.  You can lift up the cartilage easily and use the kitchen shears to cut the breast meat away from the bone.  Continue using the small knife and the shears to cut the solid portion of the breastbone out of the bird.  The only part that is difficult is the forward part, where you will need to cut through the shoulder area where the wishbone is.  Again, don't be afraid to apply some muscle as necessary.  

When you're done, here's what your bird should look like:

Flip it over, breast-side up, then press it down until it is folded flat.  You could quit now, but the last step is really easy, and after all of the trouble removing the breastbone and backbone, why not just go ahead and cut a couple of slits in the skin to tuck the drumsticks in?  It only takes another minute or so.  If you do, you'll have a nicely trimmed bird that looks like this:


Rub Your Bird

An optional step, but one that may give a little extra kick of flavor to your finished product.  I read about this on the Internet at BBQ Revolution.  It's called the dirty rag technique.  I'll talk more about it later, but for now just go ahead and use your favorite dry rub on the skin of the chicken.  You can do this on the bone side too - I do!  One of my favorite rub recipes is Mike Mills' Magic Dust rub.  Mike is a champion barbecue chef with 6 restaurants and countless competition trophies.  The recipe for the rub can be found all over the Internet.  Mike says it is his competition rub, but I'm not sure it is 100% accurate, because he's been quoted as saying that his rub has 13 ingredients, yet the published one only contains 9.  Here's a link to the recipe and a video of Mike from Good Morning America: http://abcnews.go.com/GMA/recipe?id=10868429

Here's a photo of my chicken after sprinkling it generously with the Magic Dust:


Give Your Bird a (Non-lethal) Injection

Like most of what I write, this is optional.  Some people feel that brining their chicken is enough.  Others just take the chicken out of the refrigerator and throw it on the grill.  We all have to decide how much effort we are willing to put forth in pursuit of a moist, delicious chicken.  I chose to both brine and inject this bird. Pasture-raised chickens tend to be leaner than store-bought Tyson or Hormel chickens, and an injection of fat and fluids helps guard against dryness, especially in the white breast meat.  Besides, it's fun to play doctor!

Chicken Injection Recipe:
1/2 stick butter, melted
1 cup apple juice
Mix both ingredients vigorously using a fork or whisk.

Marinade injectors are not hard to find these days.  You should be able to pick one up at Menards, Lowes, or Walmart.  I purchased mine at Menards for about $4.50.  Place the injector in the butter and juice mixture and pull up on the plunger to suck the liquid into the plastic tube.  Then, insert the point of the injector into the chicken.  It will require some force to penetrate the skin, but be careful not to penetrate all the way through to the other side of the meat.  Inserting the needle at an angle may make it easier to accomplish this.  Once the needle is inserted, depress the plunger. You should be able to observe the skin and flesh of the chicken plumping up as the liquid enters the meat.  If you feel the meat, you should be able to feel it getting firmer as well due to the hydraulic pressure of the marinade.  Eventually, some of the marinade will squirt back out of the injection site. When this happens, remove the needle and select another injection site.  I try to space my injections about one inch apart over the entire top side of the bird.  


Smoke The Bird

You are going to want to smoke your chicken low and slow.  I usually smoke chicken at between 225 and 250 degrees fahrenheit for four hours.  Since this bird is spatchcocked, I can increase the heat.  So I'm aiming at a temperature between 250 and 275 degrees.  Don't be too concerned though...you can smoke a spatchcocked chicken at up to 350 degrees and still achieve good results.  In fact, higher temperatures may be better where you are looking for a crispy skin.  Since I'm making pulled meat, I don't really care about the skin and would rather cook lower and slower as insurance for a moist, tender breast.

My smoker is on the fritz, so I'm using my Huntington grill.  The grill is set up for indirect heating.  One grate has been removed.  Where the grate was, I placed a pan of water and a smoker box full of hickory chips.  I recommend apple chips for this, but I didn't have any today and decided to use hickory instead.  Hickory isn't bad for chicken, but apple or peach (if you can find it) are definitely better.


The Huntington is a four-burner grill.  I turned the rightmost burner on high, and the next one over on low.  The two on the left side are both turned off.  I had to fiddle with that second-burner-from-the-right throughout the cook to ensure a temperature no lower than 250 and no higher than 275.

To keep your bird from drying out, you'll need to spray it about once an hour with some apple juice.  I have a food-grade plastic spray bottle that I use for this purpose.  Don't try to get fancy and put herbs or spices in your spray bottle.  It won't work and you'll just clog the nozzle.  Straight apple juice is really all you need. 


Give Your Bird a Rest

Your chicken is done when it reaches a temperature of around 175F.  On a spatchcocked bird such as this, the coolest part may not be the breast.  In fact, when I took mine out of the smoke, the breast was 190F and the inner thighs were 175F.  However, even though it is done cooking, it's still not dinner time.  You need to let that bird rest for fifteen minutes.


Place the bird on a board, a platter, or a tray, then cover it with foil to retain any moisture that steams out.  I used one of those Reynolds aluminum foil roasting trays and covered it with more foil.  Whatever you use to cover and enclose it, leave it to sit for 15 minutes.  This will allow any juices to soak back into the meat and also let the proteins relax a bit.


Prepare Your Sauce

While the chicken is resting, you may as well go ahead and prepare your sauce.  Since this is a North Carolina-style sauce, it's supposed to be a spicy, vinegar-based sauce.  It should not taste like those tomato-based sweet sauces you find in the Deep South, nor like one of those spicy tomato-based sauces you find in the Southwest.  Here's the recipe I used:

1 Cup apple cider vinegar
1/2 Cup ketchup
2 Tbsp brown sugar
2 Tbsp worcestershire sauce
2 Tbsp butter
2 tsp salt
2 tsp hot pepper sauce

Combine all ingredients and simmer until thickened to your preference, about 10-15 minutes.

Pull Your Meat

It's time to make use of the "dirty rag" technique.  First, cut the skin off of your chicken, making the pieces as large as possible.  I made three pieces of skin: one from the breast, and one from each leg/thigh.  I didn't bother skinning the wings.  I just saved those to eat whole later on.


Next, go ahead and pull the meat off of your chicken, tearing it into smallish pieces that will work well on a bun.  You may choose to separate the white meat from the dark meat as I did.  Either way, once you have the meat pulled from the bones, take the skin pieces (the "dirty rags") and rub them all over the pulled chicken, transferring spices and smoky flavor from the skin to the meat.  Once you're done rubbing them on your meat, you may dispose of the skins. 


Finally, spoon your sauce over the meat and stir to mix thoroughly.  If the meat is still hot, go ahead and serve it with warm hamburger buns.  Otherwise, you may need to reheat the chicken before serving.  I find that if you keep the sauce on a low burner while pulling the meat (and give it a quick stir now and then) you can mix the sauce with the pulled chicken and it will warm up the chicken to a nice temperature for serving.

Serving suggestions

The following sides are excellent with North Carolina-style Pulled Chicken:

Corn on the cob
Greens (either collard, mustard, turnip, or a mixture)
Cucumber and onion salad


Have fun and good eats!


Friday, August 10, 2012

It's Duck Season!


Pick Your Duck

When we were at the farmer's market last weekend, I passed a stand I didn't remember ever seeing before.  It was Dolan Farms Poultry.  They don't have much of a web presence, but their chalkboard sign indicated that they sell ducks, geese, and lamb.  We'd already purchased a chicken, a dozen eggs, and a bunch of produce and were running low on cash.  Unfortunately, most places at the farmer's market don't take cards, so we ended up purchasing the smallest duck they had on hand - about 3.25 pounds.

I was surprised they had a duck this small - I buy 5-pound chickens at the market regularly, and expected ducks to be at least that size.  Conor Dolan, the farm's owner, explained to me that they harvested their ducks earlier than usual this year and so they were running smaller.  Normally, he said, they would be in the 5-to-7 pound range.  He didn't say why they harvested them early, but I'm guessing it has to do with the extreme drought we've been experiencing.  This drought has been particularly tough for farmers who raise pastured animals.  These producers aren't used to paying for grain at all, but with the fields dried out there isn't much for the animals to graze on, and so they are  forced to purchase grain just to keep their livestock and poultry alive.  As well, they are having to pay record high prices for that grain due to low corn and soybean yields.

Prick Your Duck


Regardless of the reason for the small size, I was still quite happy to acquire this duck.  I didn't know exactly what I was going to do with it, but I was sure it was going to be good.  After kicking around various treatments, I decided to smoke it.  Furthermore, since my smoke is currently Out of Order, I decided to smoke it on my gas grill, and to use the rotisserie spit.  But before doing any of this, I decided to brine it.

I used my typical brine solution:

Typical Brine Solution
2 quarts water
1 cup coarse kosher salt

I placed the bird in a stainless-steel pot with the brine and then covered it with a plastic ziploc bag filled with water to hold it down underwater.  It stayed in the brine for five hours.  When it came out of the brine, I rinsed it and put it on the cutting board.  Here's what it looked like:


The first thing I noticed was that ducks have much longer sternums then chickens and consequently more breast meat.  The next thing I noticed is that, although ducks are known for being fatty, this duck was very lean.  There was some fat under the skin of the breast, but otherwise I couldn't see any visible fat deposits at all.  I pricked the skin of the breast repeatedly with the point of a sharp knife to allow the fat to drain out while it turned on the spit.  I was careful not to pierce the meat though!  I didn't want any of the juices in the meat to drain out, because that would make the meat dry and tough.

Blow Your Duck


Next, I dragged the fan out of the bedroom and plugged it into the kitchen to blow across the duck.  This would help to dry out the surface and form a nice pellicle for the smoke to adhere to.  I kept the fan blowing on it for about an hour, and I flipped it and rotated it a couple of times to make sure the back and both ends were dry as well.  You could skip this step if you needed to and just pat it with some paper towels, but forming a pellicle creates a significantly browner skin and a thicker smoke ring.


Tie Up and Spit Your Duck

As I said above, you don't want to pierce the meat and allow the juices to flow out.  That would defeat the whole purpose of the brine.  Fortunately, my rotisserie spit came with four-tined forks that fit just perfectly around this duck, creating a sort of cage that held it in place and supported it without any of the tines actually piercing the flesh.  It's a little hard to tell from the photos, but none of the tines are actually going into the meat.  One is going between the thigh and pelvic area in the photo below.  Another is going over the breast skin, but appears to be going into the breast meat because of the camera angle:


Here's another photo showing the back side:


Slather Your Duck With a Sweet, Sticky Sauce

I used maple syrup. Fake, flavored corn syrup is *not* maple syrup and will not give your duck a good flavor.  This bird gave it's life for your gastronomic enjoyment, so please treat it with the respect it deserves and use a quality maple syrup.  Alternatives include light molasses, fruit juices, or jam/jelly/marmalade.  Cherry and orange are favorites, but you should seriously consider raspberry or peach.  Be creative, but remember that bright, sweet flavors work the best for duck, and sticky is good for getting the smoke to adhere.  


Speaking of smoke, I should point out that duck is not chicken.  It doesn't taste the same, it doesn't have the same texture, and it takes much longer to cook.  Don't make the mistake of thinking you can use you favorite chicken recipe and substitute duck for chicken.  You just can't.  It won't work and you'll end up having pizza for dinner.  On the other hand, duck can be much, much more delicious than chicken when cooked properly.  In particular, it's stronger flavor stands up well to lots of smoke, and the tougher texture of duck lends itself well to low-and-slow cooking.  That makes smoked duck a natural, and doing things like forming a pellicle, using a sticky basting sauce, and selecting woods with stronger flavors (I used hickory) are perfectly reasonable actions when cooking duck, even though I wouldn't recommend these things for chicken.  In fact, these days I hardly smoke chicken at all.  When I do, I just brine it and through it on the smoker, but I'm much more likely to grill it than to smoke it.

Smoke Your Duck

I mentioned earlier that my Kenmore vertical smoker is down, right?  It has a bad regulator, and in typical Sears/Kenmore fashion, they used custom threads on the valve hose so you cannot use an off-the-shelf replacement regulator from Lowes or Menards.  I guess they figure they can sell more smokers that way.  In any case, I have plans for that smoker that will be detailed on this blog in future articles.  For now, I'm getting by using the new Huntington gas grill that I received for my birthday last April.  It has four regular burners plus a rotisserie burner.  In the photo below you can see my setup for the duck:


I removed the grates so I could put the wood chips closer to the flames.  I've only got one wood chip box (the one from the Kenmore, on the right side of the grill) and this is a fairly large unit that is much less air-tight than an actual smoker so I supplemented the wood chip box with a heavy steel colander full of hickory chips (on the back left side of the grill).  In the middle, under the bird, I placed a drip pan.  Even though the duck is spitted on a rotisserie, I'm not using the rotisserie burner because I'm smoking the bird and need to use the regular burners to keep the wood chips smoking.  Hopefully this makes sense to you...if not, just post a question in the comments and I'll try to give a better explanation.  Also, here's a couple more photos that might help explain what I'm trying to accomplish:


The drip pan catches fat dripping off the duck so it doesn't cause flare-ups.  Also, I'm used to using a water smoker (my old Kenmore is a water smoker), so I put water in the drip tray, thus it is pulling double duty by adding humidity under the grill hood while also catching the dripping fat.


See how much smoke is pouring out of the unit (above)?  That's both good and bad.  Good, because the duck is being exposed to a lot of smoke.  Bad, because I have to keep opening the hood to replenish the wood chips as they burn down.  Every time I open the hood, the temperature drops and the smoke exits.  I don't get too frustrated by this though...it is what it is, and life is full of trade-offs.  Smoking meat takes patience, and patience is virtuous.

Eat Your Duck


Here's what the duck looked like near the end of the smoke.  I think I went another 20 minutes or so after this photo because the inner thigh meat wasn't quite 165 degrees yet (which was the internal temperature I was shooting for).  This is because, when you truss a birds legs, you're creating a sort of "pocket" between the pelvic area and the inner thigh, so the inner thigh is somewhat protected from the heat.  Since the thigh meat of a duck is some of the most wonderful, flavorful meat on the bird, you don't want that to be undercooked.  Besides, if you are cooking low and slow and you brined your duck properly, another twenty minutes isn't going to hurt anything.  It's actually pretty hard to overcook a duck when your grill/smoker is only running 200-225 degrees!


Finally, here is the finished product.  I smoked it at about 215-225 degrees for 4 1/2 hours.  Remember though that this is a pretty small duck.  If you have a larger one (which you almost certainly will, especially with a domestic bird) you will want to smoke it longer at that temperature.  If you're in a hurry though, feel free to crank the heat up as high as 300, just make sure you brine it good first and baste it while cooking.  


Once you pull it off the smoker, let it rest for 15 minutes before carving.  Otherwise you will lose all of the juices as soon as you cut into it and it will taste very dry.  

Bon Appetit!


Sunday, August 5, 2012

What else can you do with a pork belly?

Rotisserie Pork Belly

Besides bacon, is a pork belly good for anything?  That almost seems like heresy - bacon is so good, why would you *want* to do anything else with a pork belly?  The answer, I suppose, is...creativity?  Novelty?  Dare I say...boredom?  Whatever.  Last week rotisserie grilled pork belly was on the menu, and I didn't hear any complaints from Jean :)

I had a nine-pound pork belly without skin that I was preparing to put in cure, so I sliced off about 2 1/2 pounds of it for dinner.  The idea was to roll it up like a roast and then grill it on a spit.  My new Huntington grill has a rotisserie burner and we've been roasting one chicken per week, so it seemed like a good idea to branch out and put something else on the skewer besides poultry.

Brine the Belly

I only brined the pork belly portion for an hour, since this was a last-minute flash of inspiration.  The rule in our house is that dinner absolutely has to be on the table before 8pm, and I estimated that it would take at least two hours to cook this pig.  Although simple, I'll give you the brine recipe just in case this is your first time:

Saltwater Brine
2 Quarts Water
1 Cup Kosher Salt

Combine all ingredients and stir until salt is thoroughly dissolved.  Put meat in brine.  To ensure meat is completely submerged, put a ziplock bag full of water on top, or else push a plate down on top of the meat until it is submerged. Or you can do as I did and just place the brine and the meat in a really big ziploc bag.  Whatever you want to do is OK, as long as the meat is completely surrounded by the brine.
Ideally, you will brine your meat for at least four hours but no more than 12.  These are just guidelines though, and every piece of meat (as well as every cook) is different.

Form the Pellicle

Once the brine is done, take the meat out and rinse it thoroughly, then pat it dry.  At this point, you may choose to leave the meat to sit out and form a pellicle (a dry, slightly sticky exterior).  The pellicle will help smoke particles to adhere to the meat.  You might even set up a fan to blow air across the surface of the meat, which will help the pellicle to form faster.  In my case however, I was looking to get things moving along as quickly as possible so I skipped this step.

Season and Roll the Belly

For the seasoning rub, I placed a combination of herbs and spices in a small food processor to chop and combine.  Here are the seasonings I used:

Herbal Seasoning for Pork Belly
3 large cloves of garlic
1 tsp ground sage
1 tsp fennel seeds
5 bay leaves
2 tsp dried rosemary
1 tsp black pepper
1 Tbsp kosher salt
10 small sprigs of fresh thyme
1 fresh shallot, chopped

Before
After
Place all ingredients in a small food processor and pulse until minced and combined.


Now you are ready to tie up your meat.  Place it on the cutting board, fat side down, with some butcher's string beneath it. I used three pieces of string for mine:

Next, spread your seasoning on the top of the belly using a rubber spatula or wooden spoon.


Then roll up the belly and tie the pieces of string.  Here's a view of  mine from the top:

And from the end: 

The outside of the rolled pork belly is pretty fatty, so this step may be superflous, but I brushed mine with olive oil anyway.  I brush almost everything with olive oil, it's just how I roll.  It certainly can't hurt.  I also like to throw salt on things that aren't slugs, but I skipped the salt on this project because it's already been brined in salt water and too much salt can make things taste bad.


Grill the Pork Belly


You can't eat raw pork belly - it isn't good for you.  So I set up the grill for rotisserie cooking.  For me, this means placing a tray under the meat to catch the juices and turning on the rear rotisserie burner.  The rotisserie burner is a nice option on the grill because it allows you to cook meat on the turning spit without worrying about flare-ups from the grease dripping onto the flames below.  Instead, the flames are at the back of the grill.  This is the first grill I've ever owned that has this feature, and I've used it every week since I got it.  It makes amazing chicken!  Anyway, here is a picture of the grill set up for rotisserie cooking:


I heated the grill to 500 degrees before putting the belly on so that it would get a nice sear.  Here's a shot of the pork belly.  You can see the special rotisserie burner running across the back of the grill:


Here's the belly partway through the cooking time.  Notice all of the drippings in the pan, and the nice crispy exterior forming on the belly.  This is going to be good :P


Eat the Pork Belly

I can't grill corn when using the rotisserie burner, so this corn was boiled.  Iowa sweet corn is the perfect complement to grilled pork belly, I think.  My parents sourced this corn from one of their church friends.  It's called Mister Mini and has really small ears with small, tightly-packed kernels that are very sweet.  Cooking it is almost unncessary, that's how tender and sweet it is!

Some glamour shots of the finished product: 


Bailey and Hershey were literally vibrating while I cut into this succulent roast and plated it.  Unfortunately, there were no leftovers for them.  Poor puppies!


Tuesday, July 10, 2012

Makin' Bacon

Buying the Pork

Back in June I ordered two pork bellies from Arnold's Farm in Elizabeth, Illinois.  Tom raises humane, antibiotic-free hogs along with both grain- and grass-fed beef and pastured sheep, chicken, and turkeys.  He's at the Freight House Farmer's Market every Saturday, so I took delivery there.  He needed two weeks lead time to get the hogs dressed.  His processor is AJ's Lena Maid Meats in Lena, Illinois.

Tom charged me $5.00 a pound for the bellies, not a bad price for a premium-quality product.  At the same time I also ordered some back fat, which came to 12 pounds at $2.00 per pound.  The invoice total was $110.73.  I'm pretty happy with the quality of the pork Tom is selling me, and I'm already planning some future purchases.  If you're down at the farmer's market on Saturday look him up, I'm sure you won't be disappointed!

Certifying the Pork

Do you know what "certifying pork" means?  It means freezing pork at a low enough temperature to destroy the trichinella spiralis parasite in accordance with 9 CFR 318.10(c)(2).  In general, this can be accomplished by popping the meat into the freezer for a week.  While this isn't technically necessary for pork that will be cured and then hot-smoked, it isn't difficult and adds some additional assurance that the meat is safe.  My freezer runs at -7 degrees Fahrenheit, so by keeping the bellies in the freezer for a week I've effectively killed any trichinella that may have been present.

Once the pork was certified, I transferred one of the bellies from the freezer to the refrigerator to thaw.  This only took a day, and then the meat was ready for curing.

Curing the Pork

The basic dry cure is taken from the book Charcuterie by Michael Ruhlman and Brian Polcyn.  Here's the recipe:

The Basic Dry Cure With Granulated Sugar
450 grams kosher salt
225 grams sugar
50 grams pink salt (Insta Cure #1, DQ Curing Salt, TCM, etc)

My pork belly weighed 9 pounds.  I cut it into thirds, yielding three slabs just the right size to fit into 1-gallon ziploc bags.  I mixed up the dry cure and dredged the first slab, then placed it in a ziploc bag.  Next I labeled the bag with the contents and the date.


For the second three-pound slab, I made a savory dry rub that I applied prior to the dry cure.  Here's the recipe:

Savory Dry Cure
1t garlic powder
4 bay leaves
1t ground coriander
1t fennel seed
1T coarse fresh-ground black pepper
2t dried thyme
Mix all ingredients in a small food processor or grind with a mortar and pestle.  Apply rub to meat, then apply the Basic Dry Cure (recipe above).


For the third slab, I made a sweet, breakfast-style rub.  Here's the recipe:

Sweet Bacon Cure
1/2 cup brown sugar
2T apple juice
Mix ingredients.  Rub (or brush, if thin) onto belly, then apply the Basic Dry Cure (recipe above).


Once all three slabs were bagged up, I placed them in a glass baking dish in the refrigerator.  They'll stay in there for seven to nine days, getting turned once or twice a day to ensure complete coverage of the rub/brine.  I'll update this post again when they are ready to come out of the cure and go into the smoker.


Smoking the Pork

Newsflash!  It is now a week later and I am ready to take these belly portions out of the cure and smoke them.  I've taken them out of the Ziplocs, rinsed them thoroughly in cold water, and placed them on a cookie sheet.  At this point, I would normally put them back in the refrigerator for a day to dry out and form a nice pellicle. However, I cannot wait another day on this bacon, so instead I've placed the cookie sheet on a table top and pointed a fan at it.  With a fan blowing on the meat it dries out quickly.  In about three hours the pork had a tacky and dry outer surface that would accept smoke easily.  Time to fire up the smoker!


That's my smoker.  It is a Kenmore vertical propane water smoker with four racks.  I've had it for a few years and it's been pretty trustworthy.  Unfortunately, this year I've started having some problems getting it to maintain a temperature higher than 200 degrees.  I think it needs a new regulator, and I plan to replace that soon - they're only about ten bucks from Menards or Walmart.  The good news is that bacon doesn't require a high smoking temperature.  Because it's already cured, it is fairly well-protected from dangerous microbes and only needs to be smoked to an internal temperature of 150 degrees.  This temperature can be easily achieved with a smoker running at 180 to 200 degrees in roughly two to three hours.  

You may be wondering about the green watering can in the photo above.  It is full of apple juice that I use to replenish the water tray in the smoker as it boils off.  Using apple juice instead of water adds a sweet, fruity aroma to the smoke while still keeping the air in the smoker humid so the meat doesn't dry out.


From top to bottom, we have the basic cure, then the sweet cure, then the savory cure.  I have two thermometers inside the smoker.  One is giving the temperature of the smoker and the other is giving the temperature of the hottest cut of meat (the one closest to the fire).  I don't trust the gauge in the door of the smoker, so that's why I add the gauge inside.  As long as that gauge doesn't go over 200 degrees, then I know my meat is not getting roasted.  Later on in the smoke (at about the two hour mark) I swapped the top and bottom racks so that the coolest and hottest racks changed places.  Also, I should point out that it's best to keep the meat side down during the entire smoke.  That way, any fat that renders out of the rind will soak into the meat instead of just dripping uselessly into the bottom of the smoker.

Here is a (slightly blurry) photo of the first slab I pulled off of the smoker.  It's the basic dry cure:


I cut off a slice of the end to have a taste.  It was a bit too salty, but that is ok because I can blanch it in boiling water for a minute or two before frying it.  This blanch will not only temper the saltiness, but will also make it crisp up more in the frying pan.

The sweet cured slab came off next:


I took a slice of that as well.  It's not sweet enough for my taste, but it does have a mild sweetness and is not as salty as the basic cure.\


Finally, I took the savory cured slab out (in the front, above).  This was my favorite.  It has a deep, complex flavor.  It's not sweet, nor overly salty, but it is highly seasoned.  No single spice is forward; instead there is a tapestry of different flavors that are well balanced. This was Jean's favorite, and she raved that it is the best bacon she's ever tasted.  I agree, but I always think I can do better, and so I am going to try to improve this next time. Right now I think the only thing I will change with this recipe is to add some juniper berries.


You may be curious about the long knife in the photo above.  That's actually a handcrafted Japanese sushi knife, and I'll be doing an article about it in the future.  For now, all I can say is that it is my favorite knife, I've had it for seven years and it's ridiculously sharp.  


While this bacon was still hot from the smoker, Jean and I decided to fry some up and make BLTs.  Homemade bacon is completely unlike store-bought bacon.  For one thing, it doesn't crinkle up like those thin strips of Oscar Mayer because it isn't injected with saline solution.  For another, it can be cut thicker.  Finally, the flavors are much more intense.  Jean and I both agreed that the BLTs we had tonight were the best we ever tasted.


The remainder of the slabs are going into fresh Ziplocs and will be placed in the refrigerator overnight.  Tomorrow I will run them through the deli slicer and then they will be moved to the freezer for long-term storage.